
gonna try something new
I’d love to say I’m one of those funky, cool chicks that shops vintage and antique, and pokes around flea markets on the weekends. But sadly, that’s not true. I’m a full-on suburban mom who hangs out at the big box stores like Superstore, IKEA and Costco. And while I’m there I buy everything from milk to dishes to furniture. So now my house is home to a lot of big box store furniture which seemed practical and functional at the time, and came at a decent price point.
Now that we’ve been in this house almost eight years, some of that furniture has seen it’s share of wear and tear and is looking a little tired and boring. And I’m wishing that it had a lot more character, a little shabby-chic or vintage French, flea-market-find vibe.
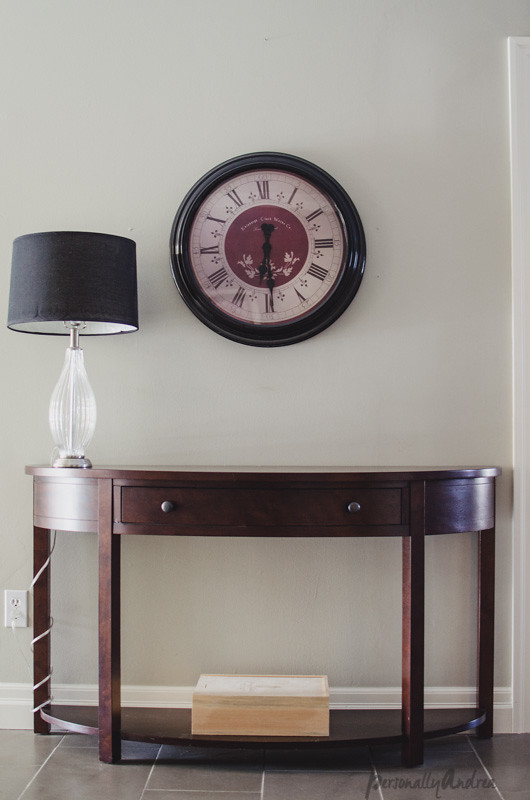
blah
This is the console table in our front hall. And I have to say, our front hall is huge. Huge. It’s a really great space, and huge. Bigger than our fourth bedroom. Bigger than our dining room. Way bigger than our basement office. So it’s great, but it really needs to be pretty functional to be taking up that much real estate. So I bought this table for practical purposes when I was at Costco once upon a time and just plunked it into this space. And it never turned out to be as functional as I wanted. Actually it turned into a Piling Place with a Junk Drawer.
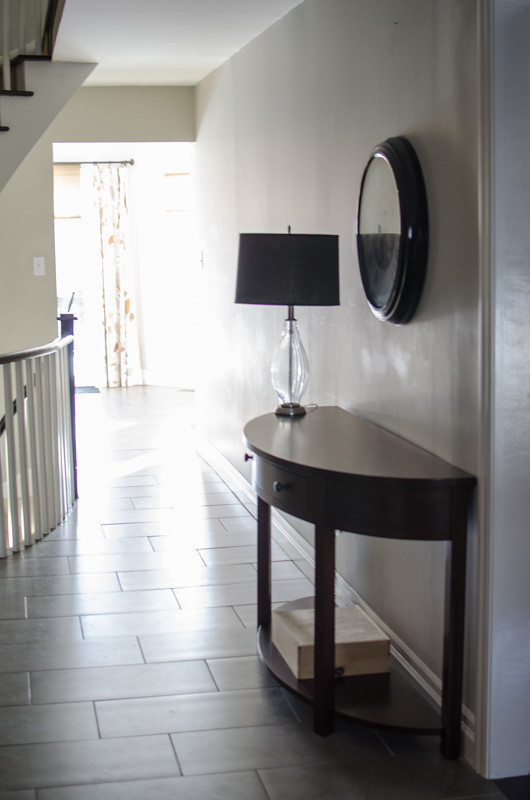
big empty space
So when Annie Sloan contacted me about trying out their Chalk Paint® this piece of furniture came to mind right away, as a jumping off point for redoing this whole space. To be honest, it only takes a little research into Chalk Paint® Decorative Paint to see that most people are painting beautifully detailed, antique pieces of furniture. And doing a stunning job of refinishing them into historically inspired, gorgeously refinished pieces. Well… I don’t really have any pieces like that, plus I would be terrified of touching them if I did. So I’m here to tell you that you can start with whatever you have, even if it’s just a little-bit-worn table from Costco, and add a lot of character to it with a half a can of Chalk Paint®, a little bit of wax and some elbow grease.
And if you’re the kind of person who cries over solid wood furniture being painted over, then this post is not for you. You should stop reading right now…don’t look at any more of the photos…maybe head over here and bake some cookies instead. Okay you can look at one more…

yay for tulips…happy dance
So, still just a little terrified, I dove right in and started painting. Which you can do. Inside. Without any prior sanding or priming or anything. Which is especially awesome because it was -20°C outside. So I sat inside my hallway and painted away.
Because I was experimenting as I went along, sometimes thinning the paint, switching brushes, sanding it in places…I ended up doing about three coats on the whole piece, and four on the tabletop surface. Then again, I was painting white over a dark black/brown (because I love the look of dark wood underneath white paint). But while working on this project I also tried a Duck Egg blue over a black frame and it covered easily in two coats. Also the Pure White over a lighter wood, and again two coats was enough. I would wait a few hours and do something else between coats, but it was probably dry enough to recoat even sooner than that.

almost done…and working inside!
Tips:
1. Be brave. You can do it.
2. Be inspired by what some other people have done. Check out the Chalk Paint® Inspiration Gallery here.
3. Do a little research and read some tutorials. This post with Tips for Beginners from Canary Street Crafts was timely and super helpful. I especially appreciated tips 3 and 9 for getting a smooth finish.
4. Everything will be okay in the end. If it’s not okay, it’s not the end. (John Lennon) If you don’t like how it’s looking, you can sand it down, paint over it, use a different colour, mix colours together, wax it, dark wax it, paint over it again without sanding or priming. Keep working at it until you’re happy with the result.
Here’s how some of the detail turned out once I had painted, distressed with 120 grit sandpaper, and applied one coat of clear wax, and was happy with the result. It was all okay in the end.


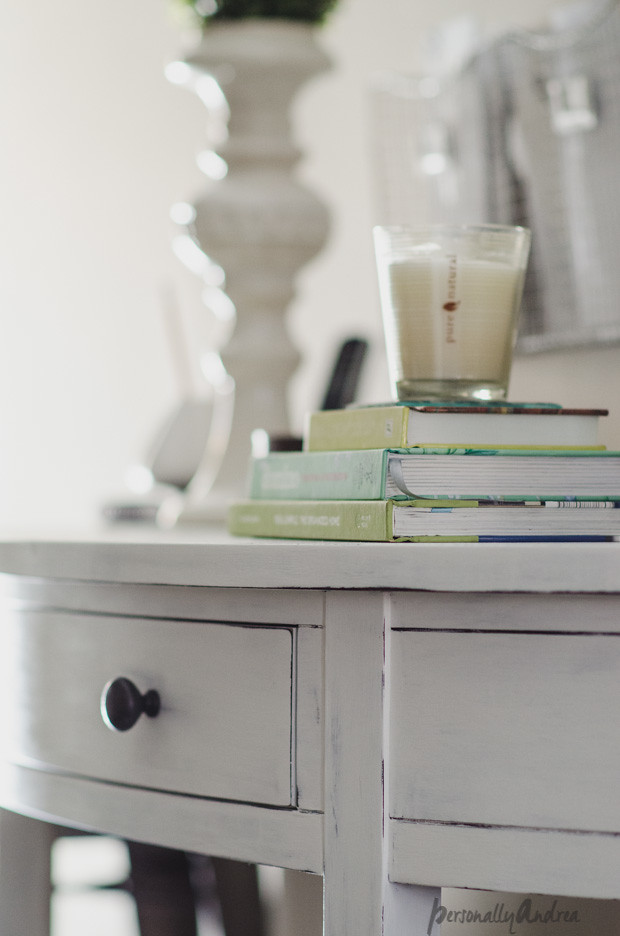
my favourite furniture thing * dark wood peeking through a painted finish
So are you ready for a great big reveal of the whole thing? Here goes… Okay wait. Just a short disclaimer to say: eleven holes were filled and repainted on this wall and eight new ones were made in the making of this post. Now here goes…

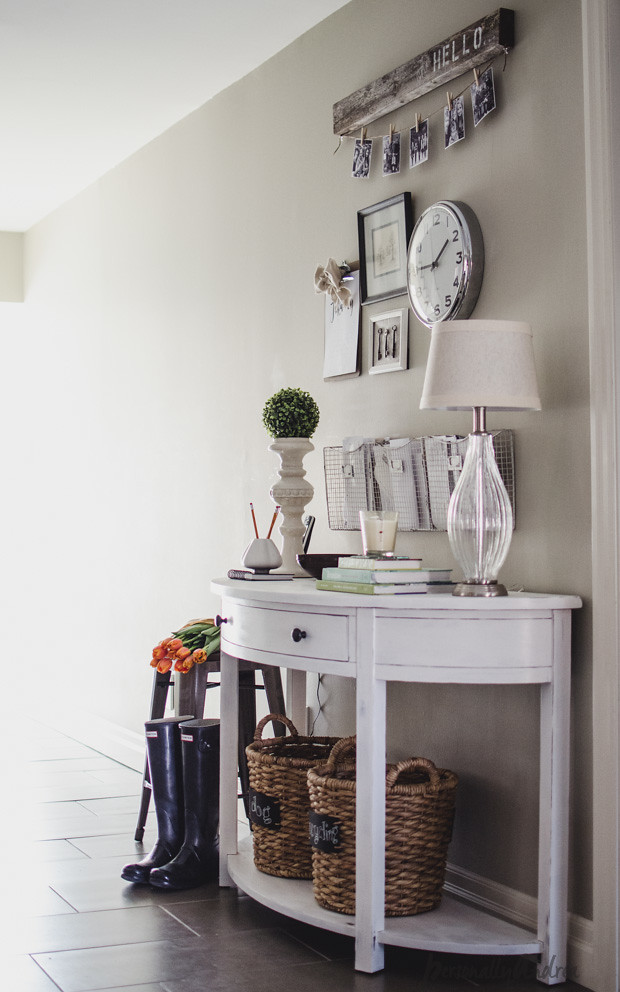
ta daaaaah * big reveal
So, what do you think? Personally I love it. This hallway is pretty dimly lit at the best of times and this has totally lightened and brightened it up. Plus it’s inspired me to tidy up the whole front entry…*ahem closet cough cough*… and make this whole space a lot prettier and more welcoming. (And if I could figure out a way to keep the floors clean for more than 20 minutes while I was taking pictures…that would be awesome too…)
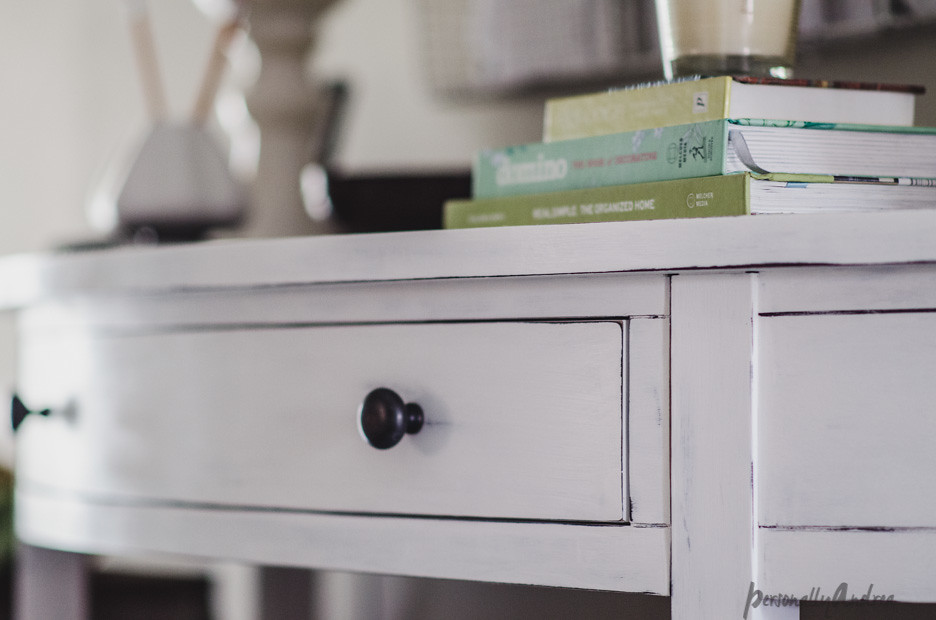
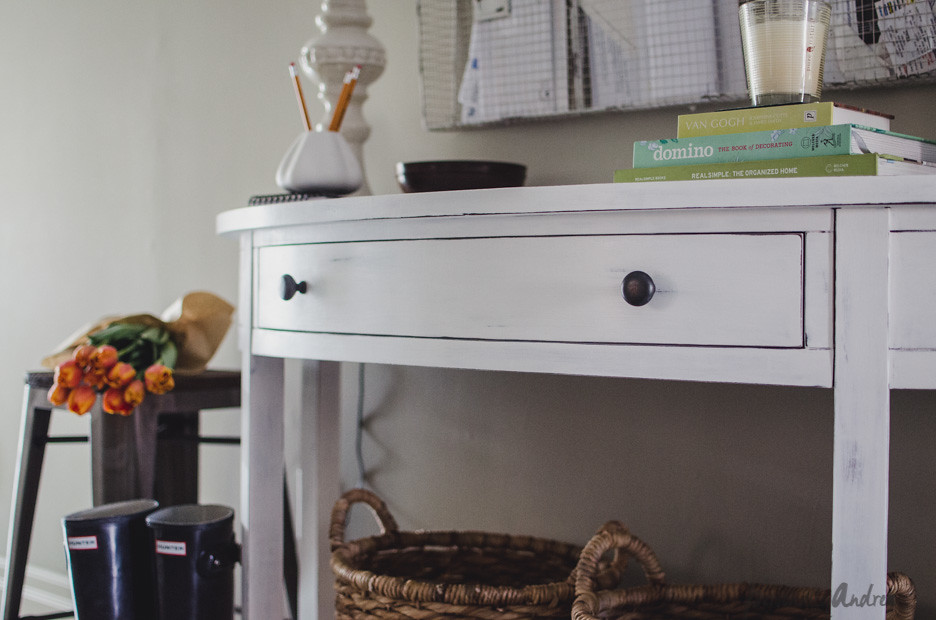
a few more details
There won’t be any more paint involved here but I do have half a can of white left plus a sample of pretty blue. I’m looking at you, 1990’s honey pine night tables from Idomo and black vanity mirror frame from Home Depot!
Also I made the oh hello sign with the photo garland especially for this project (two nail holes in the wall) and took a few photos of the process so I’ll post that little tutorial soon too. Super easy and practically free! If you don’t want to miss out make sure you sign up to receive Personally Andrea posts in your email.
So here’s a list of sources for a lot of the stuff you see in the photos. Most of it was just re-arranged from other places in the house, but some can still be found in stores now.
Sources:
Chalk Paint® decorative paint by Annie Sloan in Pure WhiteAnnie Sloan Soft Wax clear wax and wax brush
Table from Costco (old)
Industrial bar stool from Target
Lamp base from Homesense
Lampshade from Target
Rattan chalkboard tag baskets from Target
Wire mesh mail organizer from Homesense
Clock from IKEA
Pillar candle holder from Homesense
Boxwood topiary ball from Dollarama
Vase as pencil cup from IKEA (similar)
Pure Natural candle from Target in lavender vanilla scent
Calendar printable
Antique keys
Books: Van Gogh, Domino, Real Simple: The Organized Home
Wall colour Florentine Plaster from Benjamin Moore
So there you go. I hope you’ve been inspired to tackle your own big project. January is as good a time as any. One more set of Before and Afters, without the dog photo bomb.
Before & After:

before

* after *

before
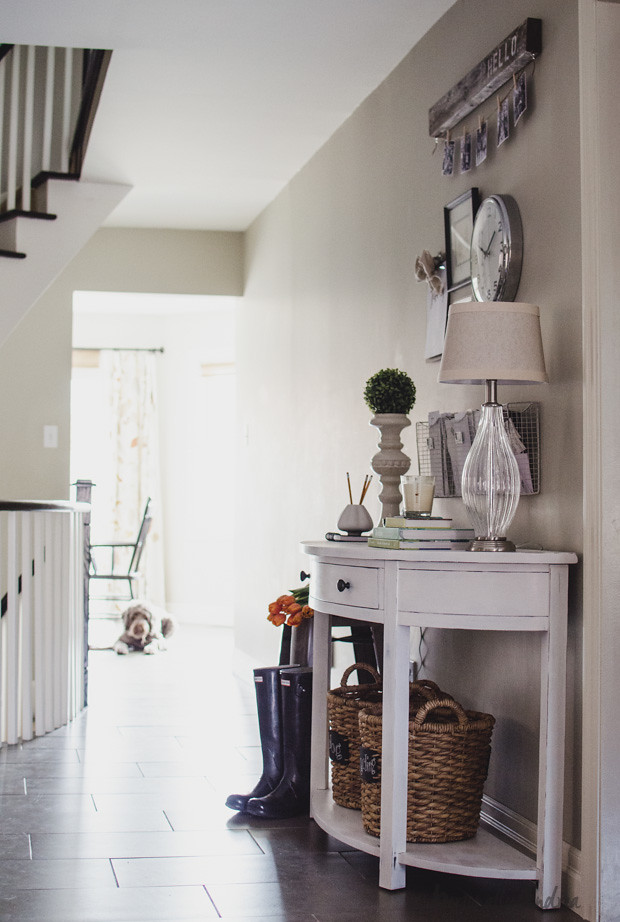
* after *
Oh well. I lied about the dog photo bomb. But she’s pretty cute, right? And does anyone want to come and mop my floors for me? Seriously.
If you liked this makeover, then also check out how I made over my big-box store chandelier and my IKEA EXPEDIT storage unit. Also, instructions for the oh, hello sign in this post.


Thanks for visiting!
If you liked this makeover, then also check out how I made over my big-box store chandelier and my IKEA EXPEDIT storage unit. Also, instructions for the oh, hello sign in this post.


Thanks for visiting!
xo andrea
Personally Andrea received free product from Unfolded, distributors of Chalk Paint® decorative paint by Annie Sloan for the production of this post. Opinions are entirely my own. I would love for you to support their sponsorship of this post by clicking on their links.linking to the diy dreamer, talented tuesday, thoughts from alice, joy in our home, the happy housie, monday funday


Sharing is lovely...

