Pages

Monday, November 23, 2015

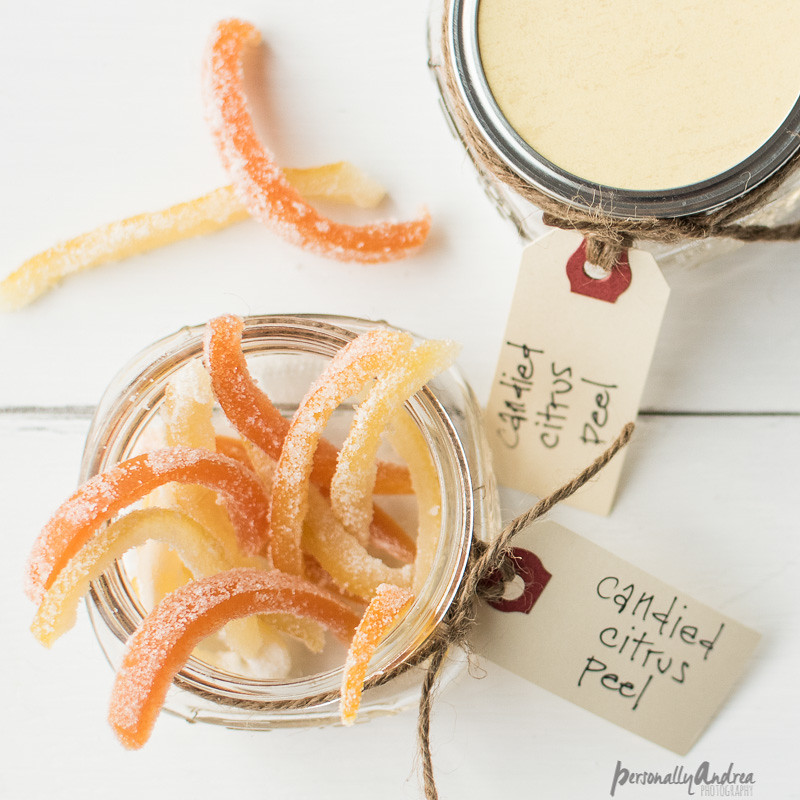
Homemade Candied Citrus Peel


A pretty package of homemade candied citrus peel makes a stress-free and thoughtful gift from your kitchen.  The recipe is forgiving and the end result looks festive.  What could be better for Christmas gift-giving?

Homemade Candied Citrus Peel Gift

* homemade candied citrus peel gift *


Tuesday, November 17, 2015

Ornamental Corn Arrangement in a Cylinder Vase


Ornamental corn in one of the prettiest elements of fall decor.  Simply arranged in a cylinder vase tied with rustic twine keeps the corn contained but still highlights the beautiful colours and shapes of the cobs and husks.

Ornamental Corn Arrangement in a Cylinder Vase

* fall prettiness on my desk *


Monday, November 9, 2015

Homemade Orange Cream Milk Bath


Homemade Orange Cream Milk Bath adds luxurious benefits to your bath, with sweet smelling orange essential oil, skin-soothing milk, cornstarch and baking soda.  Packaged in a pretty jar with a handmade label and bakery twine, it also makes a lovely homemade gift.

Homemade Orange Cream Milk Bath | Homemade orange cream milk bath with pantry ingredients plus orange essential oil.  Makes a pretty gift when packaged in a labeled jar | #spa #giftidea

Tuesday, November 3, 2015

Rustic and Cozy Winter Plaid Wreath Trio


This has been one of the most beautiful fall seasons around here in recent memory.  The colours continue to hang on to the trees or make beautiful carpets on the lawns and walkways.  The temperatures are getting colder and colder though, and with Halloween now celebrated and behind us, I think it’s okay to start transitioning our mindsets toward winter. 

Three Plaid Flannel Wreaths for Winter

* rustic & cozy winter plaid wreath trio *

Wednesday, October 28, 2015

Irish Cream with Rum AKA Jamaican Cream


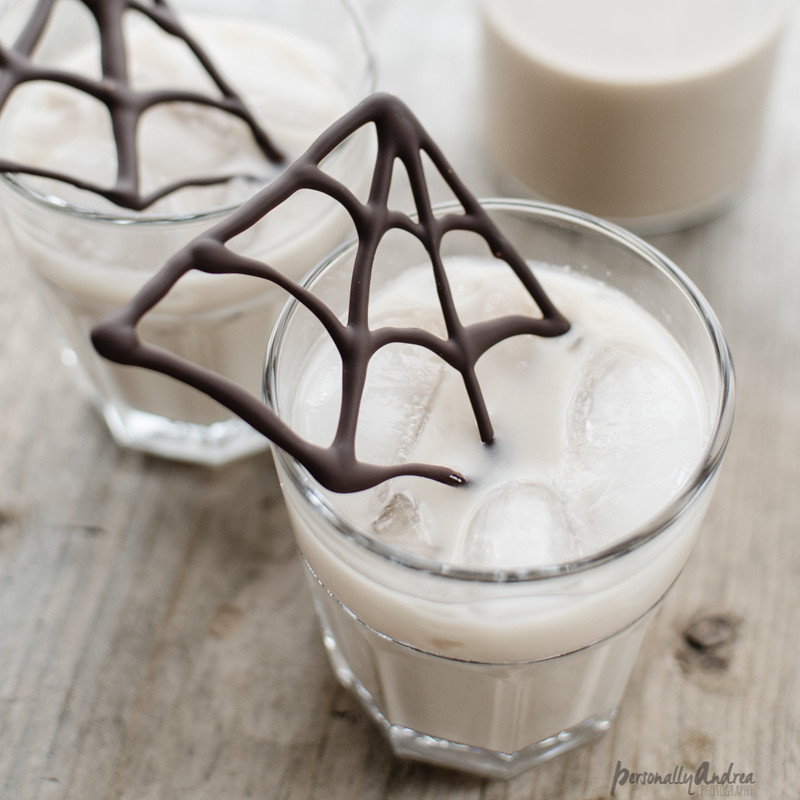
Hi again bloggy friends!  As promised here’s a second post in one week.  Hopefully you all saw yesterday’s post on Fall Photography too.   A second post doesn’t happen often around here but I wanted to sneak this one in before Halloween because of the fun spiderweb garnish.  Something for the grown-ups after the little trick-or-treaters are done for the night!

Halloween Jamaican Cream with Chocolate Spiderweb Garnish

* cheers *

I started experimenting with this recipe after I got a shipment of several rum bottles for a fun freelance photoshoot this summer.  But what to do with all that rum after the shoot was over?  I think some rumballs might be in order for Christmas but I wanted to try a few other recipes before then.


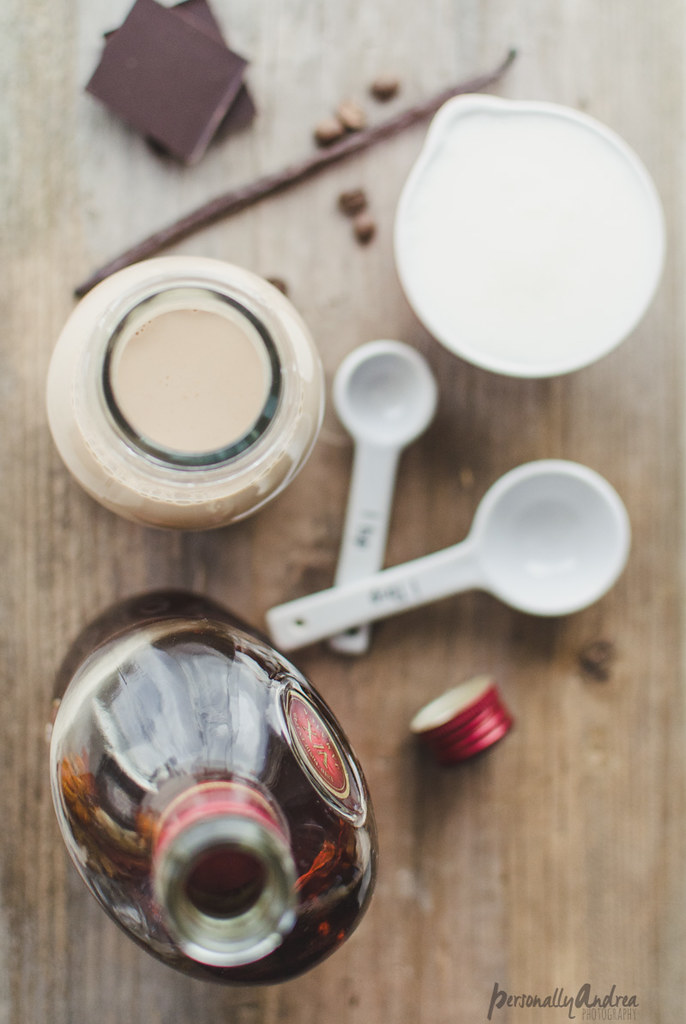
Enter this delicious twist on the classic Irish Cream.  But I guess when you make it with rum it’s technically a Jamaican Cream?  If you’ve ever made Irish Cream you know it’s the easiest thing.  A few ingredients poured into the blender for a minute and it’s done.  I literally just substituted the rum for the whiskey into an Irish Cream recipe I’ve used before that’s delish.  The rum has a slightly earthier more mellow flavour with a hint of caramel, so if you’re up for that this recipe is for you.

Halloween Jamaican Cream with Chocolate Spiderweb GarnishHalloween Jamaican Cream with Chocolate Spiderweb Garnish

* irish cream ingredients but substitute rum *

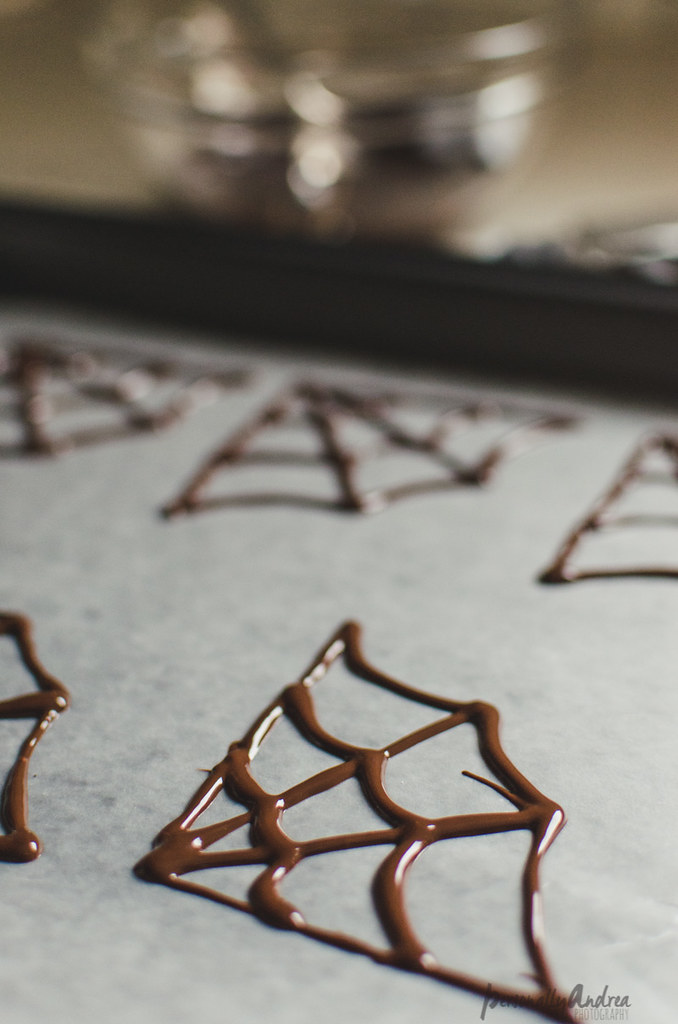
Then I also borrowed this trick from cake-decorating (which I rarely do) and used it as a garnish for the glass instead.  You guys that are good with the fancy cakes will already know what I’m talking about, but you can melt some chocolate pieces or chocolate chips and pipe it onto wax paper into any shape or design.  Then put it in the freezer to harden again, peel it from the wax paper and ta-da!  Because it was Halloween, I piped this fun spiderweb design.

Halloween Jamaican Cream with Chocolate Spiderweb-10.jpg

* pipe melted chocolate on to wax paper and freeze *


Irish Cream with Rum AKA Jamaican Cream Recipe:

1 2/3 cups Jamaican Rum (I used Appletons)
1 can condensed milk (14 oz or 300mL)
1 cup cream (light or heavy, your choice)
2 tablespoons chocolate syrup
2 teaspoons vanilla extract or one vanilla bean, seeds scraped.
2 teaspoons instant coffee.

Mix in a blender until combined.  Chill completely in the fridge to allow flavours to blend, at least six hours.  Store in the fridge for up to two weeks, if it lasts that long!  Serve with chocolate spiderweb garnish for Halloween.

Irish Cream with Rum and Chocolate Spiderweb Garnish

Now help me figure out what to do another bottle and half of rum!
Happy Halloween!


xo andrea


Tuesday, October 27, 2015

Ideas for Photographing Fall


Fall is by far my favourite season for photography.  Hopefully I can encourage you to keep your camera handy to capture the season too.   Spoiler alert...photo heavy post ahead...

Monday, October 19, 2015

Hand-Stamped Notebook Label Plus Tips for Handmade Labelling


I love to create my own labels for pretty much everything… for personalizing my spaces, organizing, and especially for gift-giving.  I created a personalized hand-stamped label for a new notebook, and shared a few of my tips for handmade labelling so that you can be passionate about it too.

***

Hand Stamped Notebook Label Plus Tips for Making Your Own Labels

* hand-stamped notebook label *

Tuesday, September 29, 2015

Kate Spade Inspired IKEA Desk


A plain white IKEA desk hacked into a Kate Spade inspired glamorous desk, with some gold spray paint and striped wrapping paper.  Read on to find out how...

Kate Spade Inspired IKEA Desk | A plain white IKEA desk hacked into a Kate Spade inspired desk with spray paint and wrapping paper | personallyandrea.com


So this is part of the ongoing story of me trying to make life happen a little bit better.  Everyone has this story, so hopefully you can relate.  My goal is always function before form.  In other words it’s more important for it to work well than to look beautiful.  But it kinda has to look beautiful too.  Here's how I came up with a functional IKEA desk made to look beautiful, inspired by Kate Spade.

Tuesday, September 22, 2015

3 Lessons for Making Your First Fall Wreath


Well here’s something new on the bloggy…a wreath!  I’ve known for a while that it was inevitable.  It’s kind of almost required to make wreaths when you blog.  I don’t know.  Apparently you guys love them a lot.  Look around Pinterest and you’ll find wreaths for every season, holiday, occasion and day of the week.  #exaggerating #notreally

Fall Kitchen Wreath

* pin me *


Tuesday, September 8, 2015

Caprese Salad Skewers with Balsamic Glaze


Simple Caprese Salad style appetizer skewers dressed up with balsamic glaze.

Caprese Salad Skewers with Balsamic Glaze


As I’m writing this it’s the very last day of summer vacation.  But I wanted to share this appetizer of caprese salad skewers with balsamic glaze while the farmer’s markets are still bursting with amazing tomatoes and our herb gardens are still going strong.


Thursday, August 27, 2015

Using a Free Printable to Make Coffee Station Art


Hey there bloggy friends, it’s been a bit of a long break around here!  It wasn’t totally intentional, but once August came around, summer hit me fast and hard and I suddenly found a lot of other things to do besides blogging.  I missed you, but I hope you found a few other things on the internet to entertain you…

Coffee Station Art from a Free Printable

* do you have a coffee station yet? *


Monday, August 10, 2015

How to Decorate a Summer Mantel with Nothing New


I’m just loving this summer, I hope you are too!  We’re at that point where we sometimes forget what week it is, what day it is, what time it is…  and that’s okay with me.  We’ve had a couple of trips, visits and weekends away, but right now everyone’s home.  And school still seems far enough away.  Perfect.

Summer Mantel

* summer mantel *


Monday, July 20, 2015

How to Pickle Beans to Keep in the Refrigerator


Quick dilly pickled beans to keep in the refrigerator.

Looking back on my post titles it would seem that I’ve become a food blogger, but that’s not really true.  It’s just that the summer time offers so much gorgeous fresh produce, and a little less structured schedule, so that there’s opportunity to experiment in the kitchen, don’t you agree?


Refrigerator Dilly Garlic Beans

* you can do this! *


Monday, July 13, 2015

How to Make Homemade Strawberry Syrup


Around here we love strawberry season.  A trip to the strawberry patch marks the beginning of school holidays and the long hot days of summer.  And baskets of strawberries on the counter mean jam-making and treat-baking and fresh-strawberry-eating for daaaays.  And also this beautiful stuff which I’ll share with you today…

How to Make Homemade Strawberry Syrup

* pin me *


Tuesday, June 30, 2015

Instagram Fun: Half a Year of #photoaday


Hey everyone!  Can you even believe that half a year has gone by?  … yikes!  How’s your year going so far?  It was one of my New Year’s resolutions to take and post a #photoaday on Instagram for all of 2015.  My goal was to try to keep up my creativity and learn something about my own strengths and weaknesses as a photographer.  I figured the halfway point is a good place to review and see how it’s going… and here we are, halfway.

Thursday, June 25, 2015

My Dairy Free Smoothie Creamsicles with 3 Ingredients


Hey everyone!  Happy first week of official summer.  If you’re like me then you’re looking for more cold and refreshing snacks lately.  And also spend less time in the kitchen and more outside.  Let’s break out the popsicle moulds and make these smoothie creamsicles.

Tropical Smoothie Creamsicles

* pin me *

Thursday, June 18, 2015

Pottery Barn Inspired Rope Hurricane


There’s always a place for some coastal or beach-y decor during the summer, don’t you think?  Either at home or cottage or cabin, or for your summer special events.  These are inspired by a Pottery Barn hurricane, but you can make them for a fraction of the cost.  Come and see how.

Pottery Barn Inspired Rope Hurricanes

* pin me *


Monday, June 8, 2015

Behind the Scenes at Merry Mag Summer: Photography


Hey everyone!  After the weeks months of planning and prep that have gone into this project by a huge group of Canadian bloggers, it’s pretty exciting to announce that here it is…

Merry Mag Summer

* yaaaay! *

I love a collaborative project, and this was a collaboration in spades.  Spearheaded and directed by Melissa at The Sweet Escape who is super-talented and creative.  Make sure you browse through her blog sometime for tons of handmade and vintage prettiness and inspiration.

Friday, June 5, 2015

I Scream for Ice Cream {New Card in the Etsy Shop}


Happy Friday everyone!  How was your first week of June?  I don’t know about you, but the first of the month totally caught me by surprise.  But now we’re into it full swing and it’s definitely time to think about summer-y things…like ice cream!

Etsy Ice Cream Card Announcement

* now available in the etsy shop *


Friday, May 22, 2015

IKEA Spice Racks as Desk Organizers


So I wonder if anyone uses the IKEA BEKVAM spice racks as spice racks?  Not if Pinterest is any indicator. Maybe IKEA will start selling them in a different part of the store someday. 

IKEA Spice Rack as Desk Organizer Hack

* pin me *


Monday, May 18, 2015

You had me at hello…and a giveaway


Hi there everyone!  Can you believe we’re halfway through May already?  Where does the time go?  

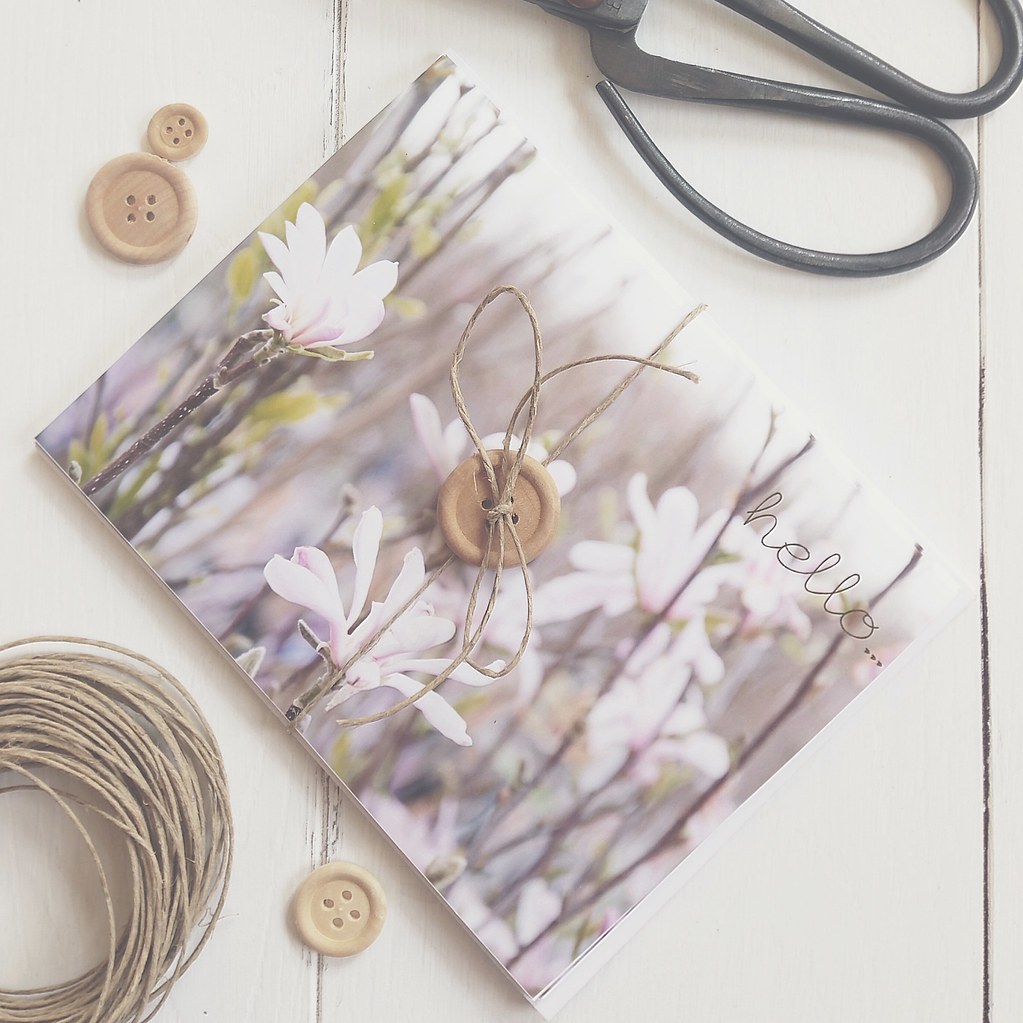
So, “you had me at hello…”  Quick, name that movie.  Or if you happen to be a guy reading this (like Mr.P.  who totally always never maybe reads this blog…)  Show me the money!!!   Isn’t it crazy how a movie can be reduced to just one line?  So this post isn’t going to be about THAT movie.  But it will be about how you can have someone at hello too.

Personally Andrea Etsy Shop cards

* hello… *


Saturday, May 9, 2015

My Mom’s Homemade Iced Tea Recipe


Hi there friends!  We spent last weekend finally getting the patio and deck furniture out of storage.  It was even hot enough to sit out and enjoy it for awhile.  Are you anticipating hotter days too?  It got me to thinking about a quick recipe I always meant to share on this blog, so here it is…  my Mom’s homemade iced tea.

My Mom's Homemade Iced Tea Recipe

* pin me *

Thursday, April 23, 2015

5 Ways to Photograph Flowers


Hey everyone!  Recently I’ve been going back into my photo library to dig out some floral photos (see what I kinda did there?).  Maybe it’s because I’m longing for some colourful outdoor photos again.  But I also found lots of photos I had taken of cut flowers and greenery indoors too.  So I thought I’d share some ways to photograph flowers differently than you might usually do it.

Tuesday, April 14, 2015

Organized Closet with IKEA ALGOT and Chalkboard Labels


Organized closet.  Sometimes I feel like those two words are only true for a few minutes at a time.  But in an attempt to declutter a kid’s bedroom as part of a redecorating project, I turned to IKEA’s ALGOT system and one of my favourites…chalkboard labels, to help make an organized closet a reality.

Organized Closet with IKEA ALGOT and Chalkboard Labels

Tuesday, March 31, 2015

Hot Cross Buns in the Breadmaker & Easter Plans


Well Easter's right around the corner!  It seems to have snuck up on us a bit, falling right at the beginning of the month.   Here’s just a quick post to share with you some of our traditions old and new, and then give you a recipe for hot cross buns you can make in your breadmaker.  If you try them I promise you’ll never buy them at the bakery again!

Hot Cross Buns Title

Friday, March 27, 2015

Dollar Store Easter Craft Goes Shabby Chic


Hey there friends.  Long time no see!  Maybe some of you have been hit by spring fever like I have? And now suddenly the end of the month is in sight and Easter is quickly approaching.  How about a little Easter craft?

Shabby Chic Easter Eggs from a Dollar Store Craft Kit

* pin me *

I don’t know how you feel about Easter crafts.  A lot of traditional Easter stuff like flowers (too early where we live), pastel colours (not a fan), rabbits (they eat my favourite grape hyacinths to the ground as soon as they finally bloom) doesn't really work for me.  But for whatever reason eggs and nests and such do work for me, and I love to decorate eggs in lots of different ways.

Friday, March 6, 2015

4 Ingredient Easy Quesadillas for a Crowd {Cooking Without a Recipe}

Well we haven’t done anything foodie on here for awhile, so let’s change that today!  This is another one of my go-to recipes, great for a week night or weekend, and really easy.  We eat a lot of Mexican, and everyone really loves these easy quesadillas.

Easy Quesadillas with Four Ingredients

* pin me *

You’ve probably made quesadillas of some sort before too.  There are so many variations around, it’s easy to    keep the ingredients on hand, and sometimes a good way to use up leftovers like some roasted chicken.  This version has only four ingredients and is super easy.  Four.  You don’t need a recipe.  Even the kids can make it themselves start to finish. 
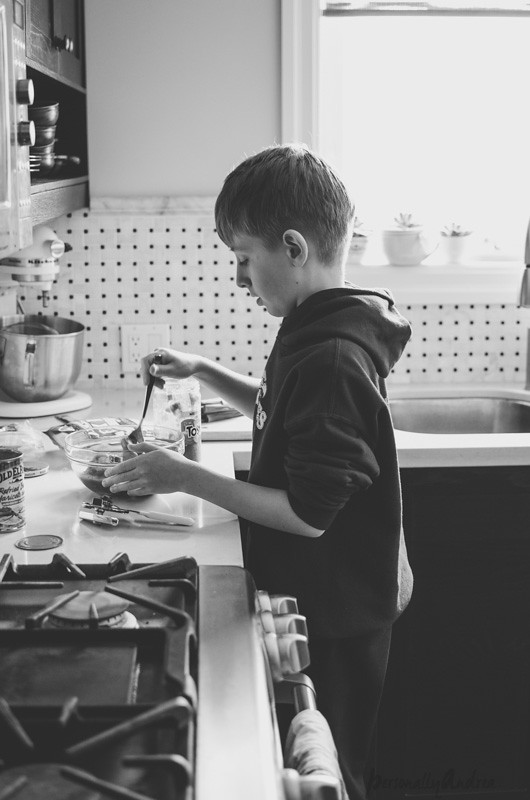
Kids Can Cook By Themselves

* kids in the kitchen *

I’ve blogged about cooking without a recipe before here.  I really think it’s a time saver and a way to make your life easier.  Sometimes you need a few things you can easily shop for on the way home when you don’t have a plan.  Or be able to make without opening pinterest or a cookbook and constantly refer to … while you’re also helping with homework, or unloading the dishwasher, or letting the dog in and out the back door. 

Chocolate Australian Labradoodle

* always in the way during meal prep *

Of course I think it’s important to be creative and adventurous… but sometimes you just gotta eat, right?

Also once you get them going you might as well make lots.  If you’re actually feeding a crowd, or your crowd is just your family of hungry boys then this recipe is for you.  And if you’re only going to have some of them, they freeze really well and just need to be heated through again on the griddle or non-stick pan, or even in the oven.  So here we go…are you still with me?  Don’t be distracted by the dog…

Making Quesadillas

* make lots *


Four Ingredients:

1.  Eight inch (the small ones) flour tortillas.  I use the white ones for this recipe, but your choice.  To make the complete for a crowd recipe, use two packages of them.

2.  Refried beans.  They come in a few different varieties.  We like the ones that have green chilies in them for a little extra heat, but I sometimes use the plain variety too.  All good.

3.  Salsa.  Any kind.  Any kind at all.

4.  Shredded tex-mex cheese.  I actually consider this a staple and my fridge is never without it.
Easy Four Ingredient Quesadillas

* all the ingredients *


How to Make Them:

1.  Empty the can of refried beans into a medium bowl.  Add just enough salsa to make a more spreadable consistency…about 3-4 big tablespoons.

2.  Then get your griddle heating, or your frying pans.  Whatever you use for making pancakes, grilled cheese, etc.  A medium-low heat, just enough to toast the quesadillas and melt the cheese.

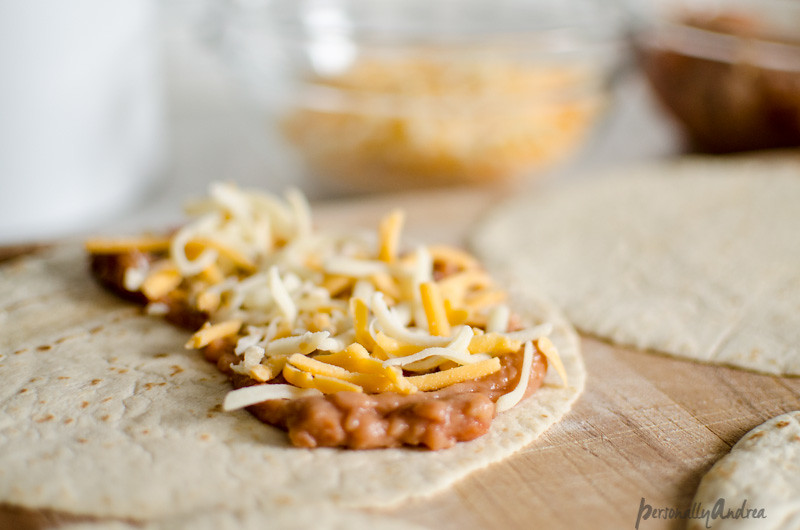
3.  Then clear up a big prep space for assembling the quesadillas.  Lay out as many tortillas as you have space for.  Spread one half of each one with the beans/salsa mixture, then sprinkle (or load up!) the same half with shredded cheese.  

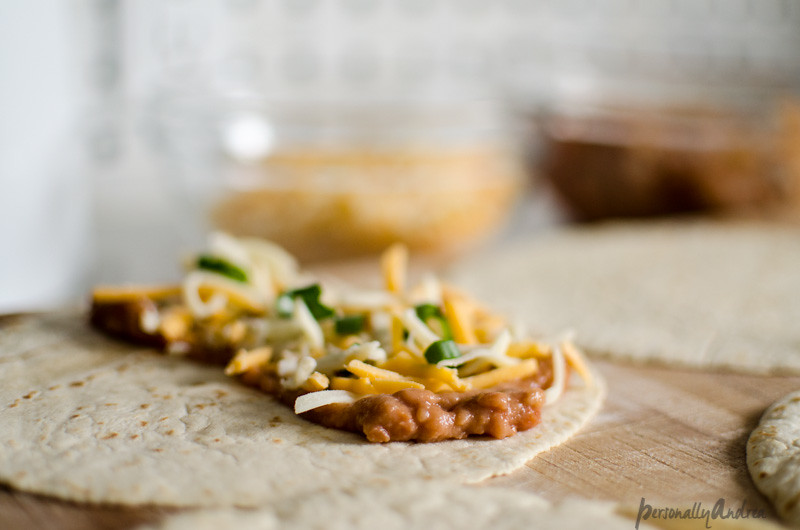
Optional:  If you are feeling fancy you can snip a little green onion over the cheese for an added layer of flavour.  Totally optional, but around here green onions rarely get used up with one recipe so there’s usually one or two hanging around in the fridge anyway.
Easy Four Ingredient Quesadillas

* optional green onion garnish *

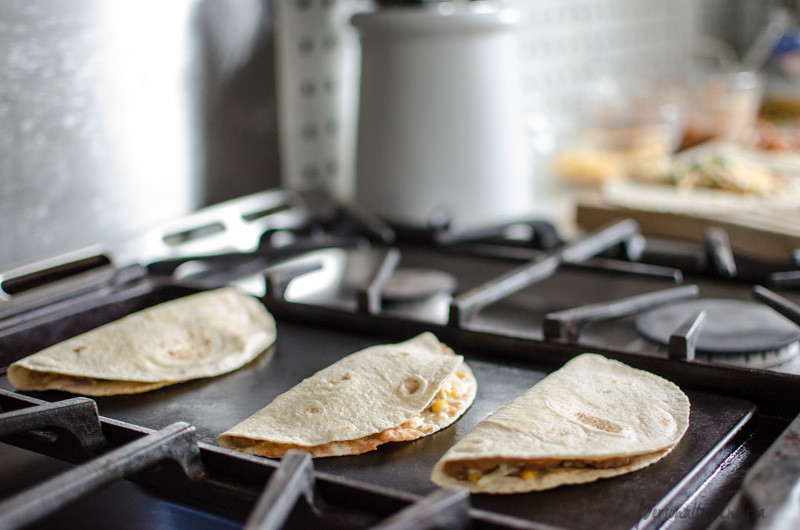
4.  Fold them over and warm them in the pan on each side till the tortilla is lightly toasted and the cheese is melted.  Repeat until all the tortillas and bean/salsa mixture have been used.
Quesadillas on the griddle

* yum, they’re almost ready *


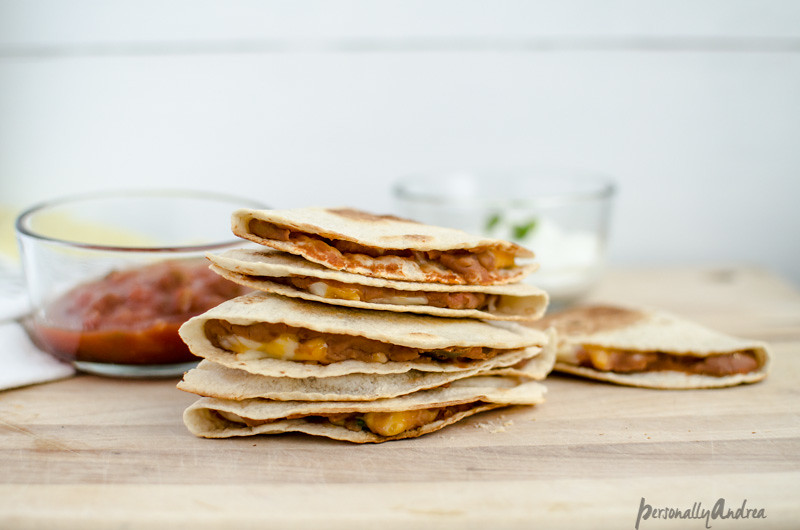
4.  Remove them from the pan to a cutting board and cut each one in half.  Then I usually just pile them all up on the cutting board and bring them to the table.  Maybe with a container of sour cream and some more salsa for dipping.   A few raw veggies with some ranch dressing and I call that a weekday meal, or anytime food for a crowd.
Easy Quesadillas with Four Ingredients

* easy quesadillas for a crowd *


Note:   If you only use one package of tortillas, or don’t use all of the bean/salsa mixture, I often will use the remaining bean mixture to make a layer dip…beans, guacamole, sour cream, salsa, shredded cheese.  Serve it alongside the quesadillas with corn chips for dipping, or cover it with plastic wrap and it keeps well in the fridge for a day or two.   Here’s a great way to make it for a party.

These are on the table in less than half an hour.  Perfect for those busy weeknights, or weekends when you need something quick and satisfying.  Enjoy!

More quick and easy dinner recipes:
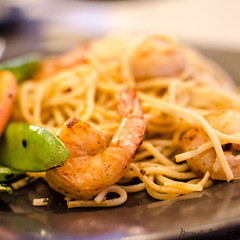
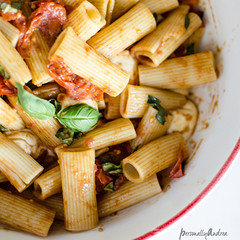
Roasted Tomato Soup garlic shrimp-17.jpg caprese pasta (12 of 17).jpg
Roasted Tomato Soup // Garlic Shrimp // Easy Caprese Pasta

xo andrea

linking to
Friday, February 27, 2015

Inspiration for an Eclectic & Affordable Tween Boy’s Bedroom


There’s something about a long winter that makes me go a little lot stir-crazy.  Staring at the same four walls day in and out, I start to get annoyed by things that didn’t seem so bad in the lazy hazy days of summer.  Half-finished projects, stuff accumulating in dark corners.  Once the Christmas stuff gets cleared away the momentum continues to tidy and organize and update and fix.  Does anyone else have the same situation?

Wednesday, February 18, 2015

Two Ways to Paint Lettering Onto a Rustic Sign

Oh Hello Sign // 2 Ways to Paint Lettering Onto a Rustic Sign

Well it’s no secret that I like to have signs and labels and pretty lettering in my home decor and on the gifts that I give.  And there are enough different way of accomplishing it that you’re sure to find a way that suits you, if you like it too.  For this project I used two different ways to paint lettering onto a rustic board to make a sign that hangs in this newly decorated space.  You can read about the whole transformation here.

Friday, February 6, 2015

How to Make Watercolour Gift Tags

Watercolour Gift Tags | Watercolor Gift Tags out of plain cardstock, with printed greetings and a simple watercolor wash | personallyandrea.com

* pin me *

When I was a kid I used to love using watercolour.  I loved the brand new set of paints, the used up palettes, mixing in water to different consistencies, mixing colours together to make new ones.  I loved the weight and texture of the paper, I loved the ombré and marbled effect of the paint.  I think maybe I missed my calling as a watercolour artist.  Probably not.

Watercolor paint palette and brushes

new paints and brushes

But recently when Michael’s had a coupon for a discount on an entire purchase, I decided to get me some inexpensive water colouring stuff.  Just for fun…for a rainy afternoon.  My philosophy is just because I’m not an expert, doesn’t mean I can’t give something a try and create something beautiful.  I hope you feel the same!  Don’t be nervous to try something new…enjoy the process and don’t worry so much about the result.  Creativity is good for the soul.

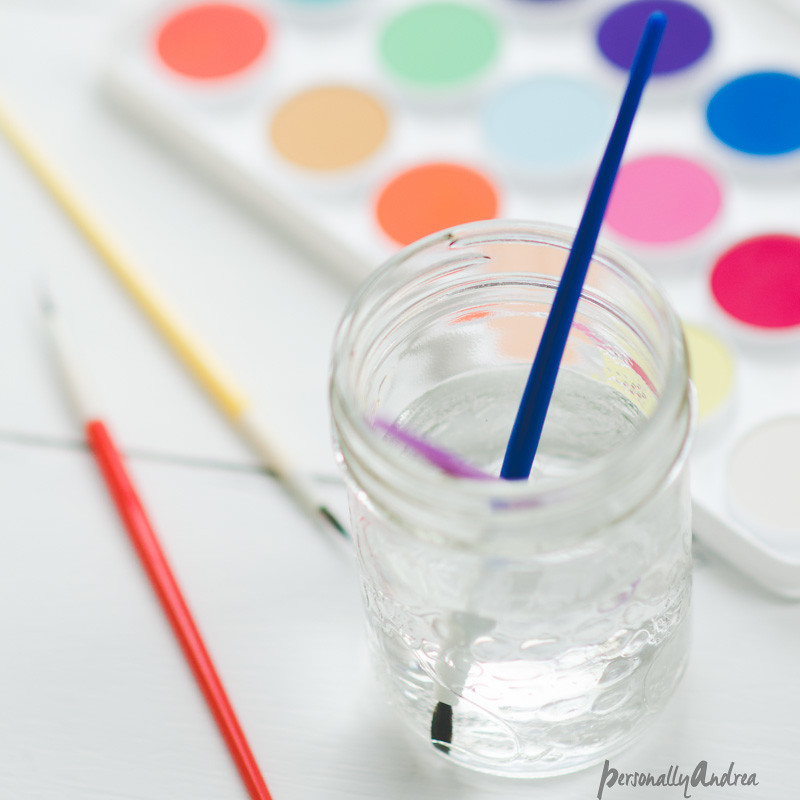
Watercolor paint palette and brushes in mason jar

pastel palette for spring

So while that rainy afternoon is probably a long way off (it is mid-winter after all) I took out my new paints, paper and brushes anyway when I saw this idea for making watercolour gift tags.  It’s from this book which I got for Christmas.  The book teaches creative hand lettering of all styles, which I can’t really teach, but one of the projects is for calligraphy on watercolour tags.  So we’ll cheat on the calligraphy part …shhh… but still end up with some pretty tags…

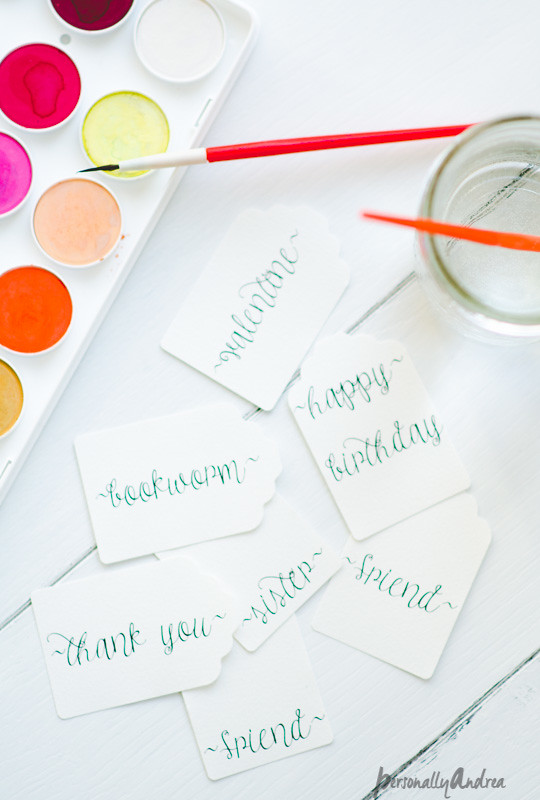
Watercolour Gift Tags

looks just like calligraphy, right?

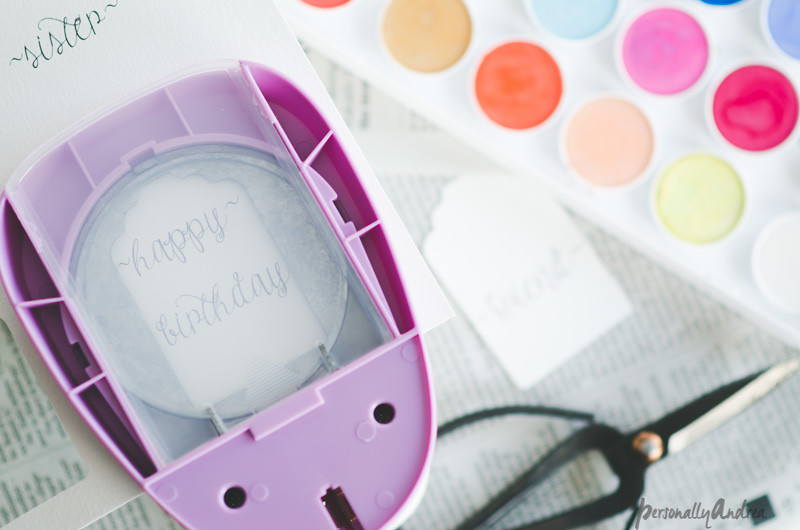
So I cheated on the lettering part by feeding the watercolour paper straight through the printer.  I laid out the words (or names) I wanted to use in three columns in a Word document, leaving enough space for the tag shaped punch I was using between each word.  I used this font which is one of my new faves, and mimics the look of calligraphy a bit.

Watercolour Gift Tags

line it up perfectly

If you’re using a punch to cut out your tag shape, hold it upside down so you can see where to line up your words inside the tag borders.

Watercolour Gift Tags

start painting

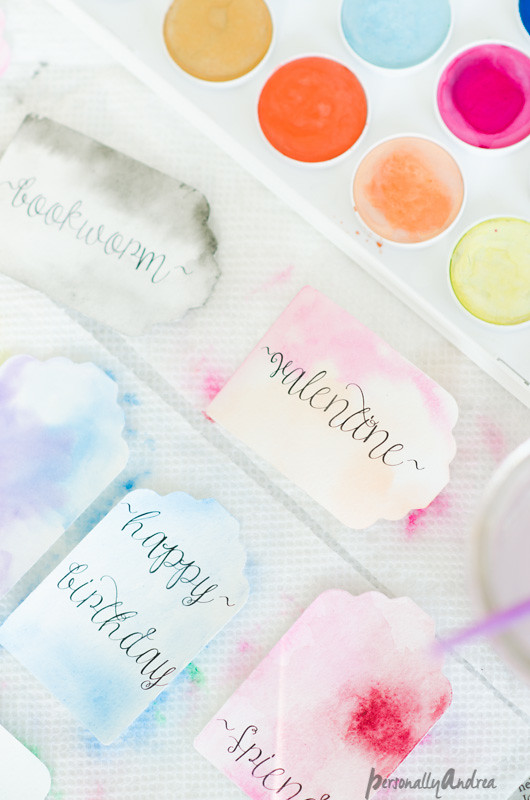
And then I just started painting.  If you’re a REAL watercolour artist please don’t cringe… I’m just making a craft…  My only tip is if you wet the paper really well before you start painting then the paints will flow and marble together to make these pretty abstract designs.


Watercolour Gift Tags

love making a mess

Depending on how wet the paper is, it will curl up at the edges even when it’s dry.  Which is fine with me but you can press them under a heavy book if you prefer to have them flat.

Watercolour Gift Tags

pretty pastels

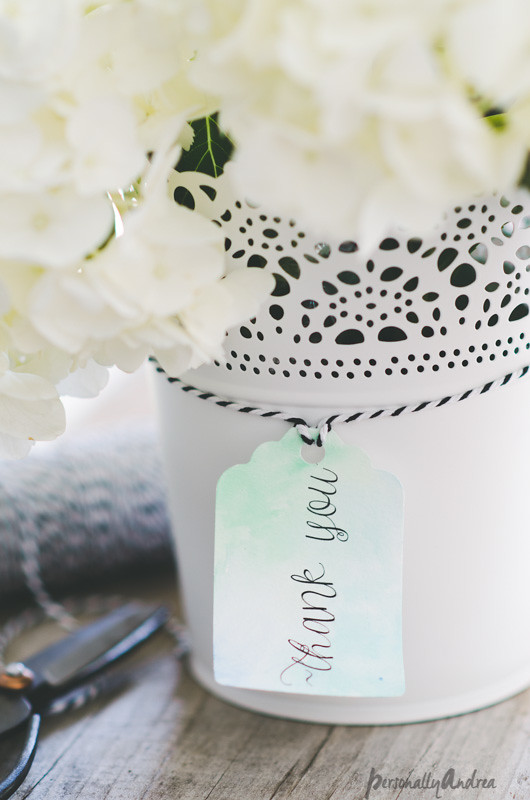
When they were dry I punched a hole in the top and tied in some twine.  I think these would be pretty for Valentine’s Day or any Spring occasion.  I had a suggestion on Instagram to use them as price tags if you sell boutique merchandise.  I would totally shop at a store that had price tags this pretty!  Wouldn’t you?

Hydrangea in IKEA flowerpot with watercolour thank you tag and bakery twine

pretty gift

Once you’re all set up, it’s easy to make a whole lot at once.  Make some with generic greetings on them like I did, or print them out with your family’s or friends’ names for a lovely personalized touch.

Watercolour Gift Tags

watercolour gift tags

What would you use these for?  Let me know in the comments… I’ve got a whole stack of them now to use up!  Hope you enjoyed my easy and pretty craft.  And hoping you have a chance to be creative too.

See you next time!
xo andrea

linking to thoughts from alice, monday funday, diy dreamer, joy in our home,